Our Power Needs
In previous posts, we mentioned our Internet setup, specifically our use of Starlinks. As you may know, two Starlinks can use a significant amount of power, with each dish consuming nearly 100Ah over a 24 hour period, not including the router.
And Starlinks are certainly not the only power hungry devices we have. Being a very connected boat, Renaissance has a lot of devices that we keep continuously on:
- Two Starlink dishes, though sometimes we turn one off at night.
- A Peplink backbone router.
- Depending on our Internet needs, one or two Mikrotik routers as backups (though we don't normally keep these on if both Starlinks are up).
- Boat electronics, including NMEA 2000 instruments for depth and wind, AIS transceiver, etc.
- Temperature sensors, base station for those, microcontrollers for custom monitoring solutions for tanks, etc.
- A boat computer, which is essentially a Raspberry Pi that performs several important functions for auto-logging sails with Saillogger, anchor alarm, AIS station for Marine Traffic and AIS Hub, Windy.com weather station, etc.
- Fridge and freezer (did I mention that the Admiral loves ice in her cocktails?).
- Stereo which stays on as it is also used for the anchor alarm.
- Several 12V powered USB outlets that are almost always charging phones, tablets or other gadgets.
None of these devices use a large amount of power individually, except perhaps the Starlinks. However, when combined, they still consume an average of 8 amps, or about 200Ah over 24 hours in a 12V system, not including the Starlinks (Renaissance is a 12V boat, so all Ah references in the article are in relation to a 12V system). If we only run one of the Starlinks for 8 hours per day, we still easily exceed 300Ah for our regular usage.
In addition to devices that are always on, we have other power needs as well:
- Two laptops constantly running during the day.
- An espresso machine, which also almost constantly runs during workdays. At 1400 watts, it draws ~110A through the inverter while in operation.
- Electric kettle and microwave, Admiral's favorites. These also enjoy competing with the espresso machine and usually beat it because they run for longer durations.
- Water maker, roughly every other week.
- TV and Roku in the evenings if we are in the mood of streaming.
- Electric heads.
- Hydronic heater if the weather is cold or we want to heat up water, which is quite power hungry with the main unit, pumps and 4 separate fans.
- All the other usual stuff from chartplotter while moving to lights (all LED for being power efficient) at night, fresh water pumps, water purification system for drinking water, etc.
When we add up our daily power consumption, it is typically between 400-500Ah. This may be on the lower end on weekends and higher on weekdays, also depending on how much we use the heater and water maker. It also depends on whether we are diligent about turning off one of the Starlinks, which I have not yet automated.
No matter how you look at it, it can be challenging to power all of these devices on a sailboat when you are not connected to shore power. Therefore, we had to carefully design and fine-tune our electrical setup to meet our needs. In this article, we discuss our approach.
Power History of Renaissance
When we purchased Renaissance, the power setup was already in good shape for a sailboat. The boat came equipped with:
- 6x100Ah Lifeline AGM house batteries and 1 100Ah Lifeline AGM starter battery.
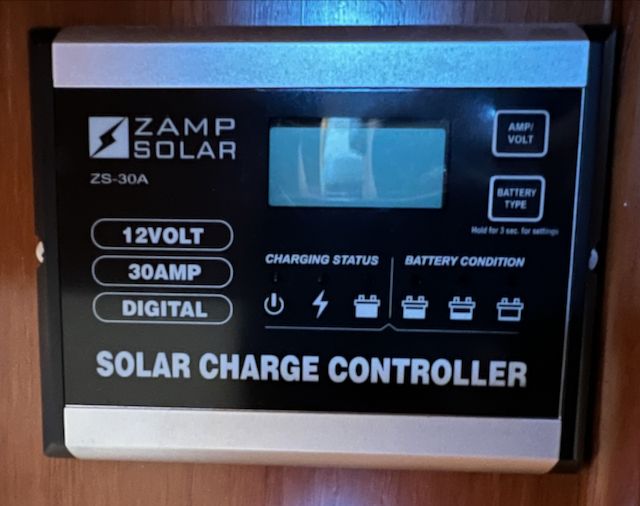
- Two 160 watt Zamp branded solar panels mounted on the bimini using custom made stainless steel mounts, with a pretty basic PWM solar charge controller.
- A Magnum power system with 2800 watts pure sine wave inverter and charger, a battery combiner and a shunt.
- Balmar 160A alternator with MC-614 charge controller.
Overall, this setup could be satisfactory for most sailboats, although some of the solar choices may not have been ideal. However, it quickly became insufficient for our needs. With AGM batteries, we had access to only 250Ah of usable power. Even without the Starlinks, we had four separate LTE connections on different routers that required a decent amount of power. The 320 watts of solar panels were not enough to make a significant impact, especially with a PWM controller.
So, something had to be done...
Short Term Improvements
There were only a few quick and short-term improvements that were possible.
The solar choices were not the best options available. I was not familiar with the brand that had been chosen, but there were certainly better choices for both the panels and charge controllers. Therefore, replacing the PWM controller with a 50A Victron MPPT controller was a no-brainer. The MPPT controller significantly increased the power we were able to generate from the solar panels and also provided some useful visibility (without going into the details of PWM vs MPPT controllers, I would not recommended to use a PWM controller for any meaningful solar setup).
After checking many different brands, we discovered that Renogy offered solar panels that were 200 watts each and had the same width as our existing panels, but were slightly longer. Since Renaissance had custom solar mounts that were already in place, it would have been very difficult to significantly alter the dimensions of the panels. By maintaining the same width, we were able to replace the panels with slightly longer and higher capacity ones, increasing our solar capacity to 400 watts, or a 25% increase. This allowed us to easily upgrade our setup without having to make major changes.
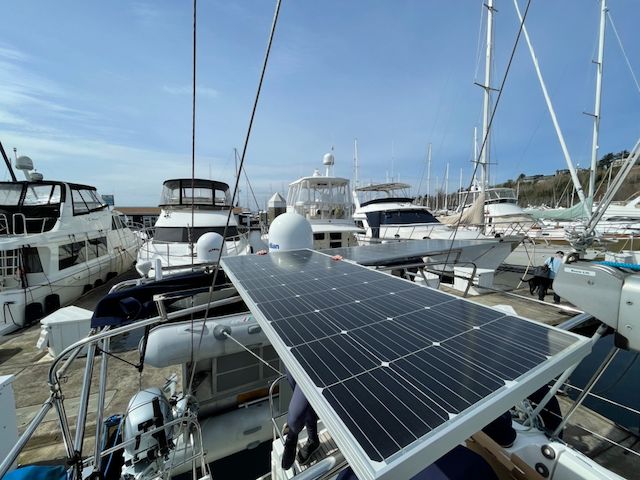
The combination of switching to an MPPT controller and increasing the size of the panels by 25% more than doubled our effective solar capacity. With these changes, we were able to generate close to 150Ah from the solar panels on a typical summer day. However, this was still not enough to meet our overall power needs.
So we needed a generator. Renaissance was wired for a marine generator, but one was not installed. We considered whether we wanted a marine generator, but ultimately decided against it. In addition to the cost, space was a major factor. We are already somewhat limited in terms of space on Renaissance, and installing a marine generator would have completely taken away the space we use for storing spare fuel cans, fishing and crabbing gear, and most importantly, the best access to the rudder post. Therefore, we quickly ruled out the idea of a permanent marine generator
After evaluating a few small portable generators, we eventually got a Honda EU2200i. There are definitely cheaper ones out there (like this Westinghouse, which we also considered) but Honda is considered the cadillac of small portable generators. They are a bit more on the expensive side but they are known for their quality, reliability and quietness. Since we always loved our Honda outboards, we went for the same brand for the generator too. The newer EU2200i models also come with bluetooth monitoring capability and automatic CO shutoff. Being a monitoring geek, I find it very handy to monitor the performance from inside the cabin and shut off using at the press of a button. We try to avoid it as much as possible but when needed, we run the portable generator on the transom with the exhaust pointing back, to ensure no dangerous fumes come back into the cabin. We also have extra carbon monoxide detectors, just in case...
Major Issues That Needed to be Tackled
While the short-term improvements were helpful, they were not sufficient to address all of the issues with the setup. There were still significant shortcomings even after these minor improvements.
AGM Batteries
Renaissance had six 100Ah high-quality Lifeline AGM house batteries, for a sailboat, 600Ah is a significant amount of power. However, we still found it to be insufficient for our needs.
First of all, charging floor for AGM batteries is about 50%, meaning you can at most use 50% of the capacity in theory And in practice, bringing them down to 50% regularly will ruin the batteries pretty quickly. So practically speaking, 600Ah total is something like 250Ah usable in reality. (Note that there are some counter arguments on this as pointed out by Patrick in the comments at the bottom. This is the most comprehensive explanation I could find on the topic. To summarize, number of possible discharges appear to drop in correlation to depth of discharge but depending on the charging profile, lifetime capacity may not be impacted that much. It doesn't really change anything written here but leaving it here for the detailed oriented).
Charging AGM batteries can also be inefficient. Even when you have a reliable power source such as solar panels, an alternator, or shore power, these batteries do not charge linearly. The charging process slows down as the batteries get closer to being fully charged. It takes a long time to charge them to 100%, and a lot of energy is wasted during the later stages of the charging process. This is especially a problem when using solar panels or even worse a generator or alternator, as sun is not always available, and you do not want to burn fossil fuels for an extended period of time. As a result, it is rare for us to charge the batteries to 100% unless we are connected to shore power, which does not happen frequently.
You also have to charge them to 100% regularly to maintain them properly. There is more about chemistry here but ignoring technical details a bit, AGM batteries are not really different than lead acid batteries and unless they are charged regularly to 100%, their life expectancy drops significantly. Combining this with the challenge of charging them to 100%, you end up in a very difficult position.
Finally, you don't really get continuous power from AGM batteries and the voltage tends to drop after some usage. This was particularly an issue for us as measured by our self invented coffee making index(!). Without charging the batteries to almost 100% every day, our espresso machine stopped working the second morning with inverter going into an not enough power mode. When you start your working day routine without an espresso, this is a pretty big deal!
Solar Power
Solar power generation is an impressive technology. While we had previously experimented with smaller, portable panels on our previous boat, it was truly mesmerizing to see 400W of solar panels generating clean and quiet energy. The only problem was that it was not sufficient and we needed much more of it!
Lithium-ion Batteries and Maximizing Solar
Recognizing the gaps with the existing setup, we went onto addressing them. This required us to replace the batteries, which then necessiated fairly major changes with the charging system. We also had to be fairly creative to maximize solar.
Lithium iron phosphate (LiFePO4) Batteries
A lithium iron phosphate battery is a type of lithium-ion battery. We should really call it a LiFePO4 battery but in practice, it is quite common to call it a Lithium battery. While there are important nuances here and you don't want to use any type of a Lithium-ion battery but specifically a LiFePO4 battery on a boat for safety reasons, we will just let it go here.
The more important aspects to cover here are the advantages they have over AGM and lead acid batteries. They weigh less, they don't require maintenance, and most importantly they have better charge and discharge characteristics, meaning you can use up-to 80% all of the energy stored in them, and having very low internal resistance, they charge almost linearly (i.e. quickly). These were most of the major shortcomings we had with our AGM batteries so as a first step we wanted to replace our batteries and install lithium-ion instead.
There are many considerations here and this document is not meant to be a full selection or installation guide for lithium-ion batteries on boats, but we will cover our thinking and choices.
The first part of this decision is to whether to use a drop-in replacement or something that requires an external battery management system (BMS). A BMS, also called the brain of a LiFePO4 battery, is an electonic component that monitors and manages the battery. Most importantly, it keeps the battery from operating outside of its safety thresholds (e.g. overcharged or over-discharged) and balances the charge across multiple cells in the battery. If the BMS detects a condition that it deems unsafe, it shuts down the battery to protect it (and you!).
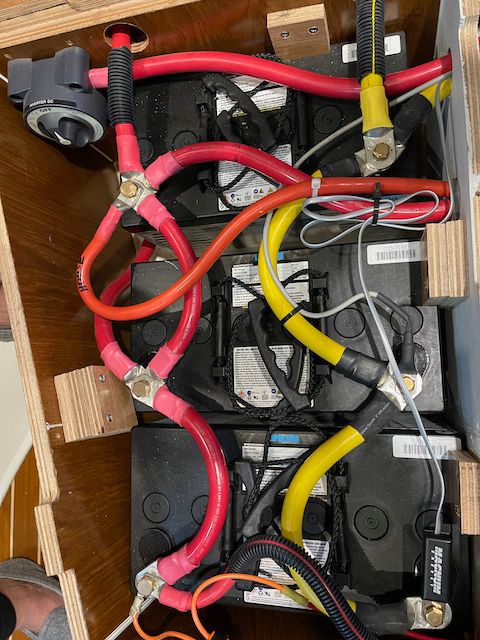
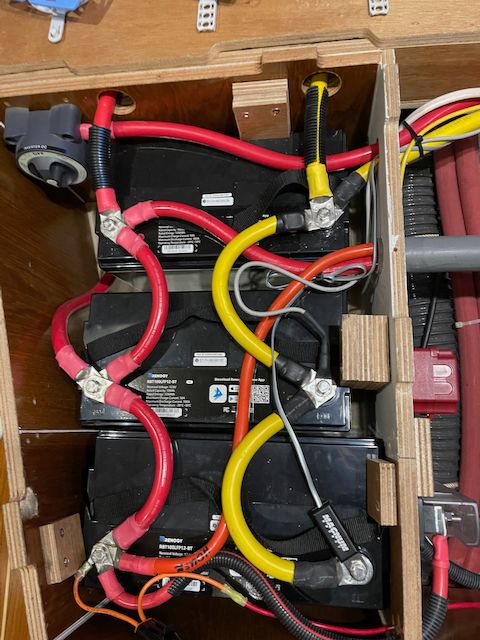
For us, this was a simple decision. Space is a key consideration and our only practical option was to replace our existing batteries with same sized ones. Changing sizes or installing external BMSes was not an option. We had 6 group 31 house batteries so we looked for a solution to replace them with similarly sized drop-in replacement batteries. At the time of this research, there weren't that many group 31 LiFePO4 batteries out there and Renogy had just announced the availability of their 100Ah Group 31 Bluetooth enabled batteries. We debated a bit but having been happy with their solar panels and seeing tear-down videos of different but similar Renogy LiFePO4 batteries, we decided to give them a try. We got 7 batteries and cut out additional space under the berth for the 7th battery. We replaced 6 of the Lifeline AGMs with 7 of them.
Changing batteries to LiFePO4 is no simple feat though. You need to adjust all the chargers to work with them and this can get complicated.
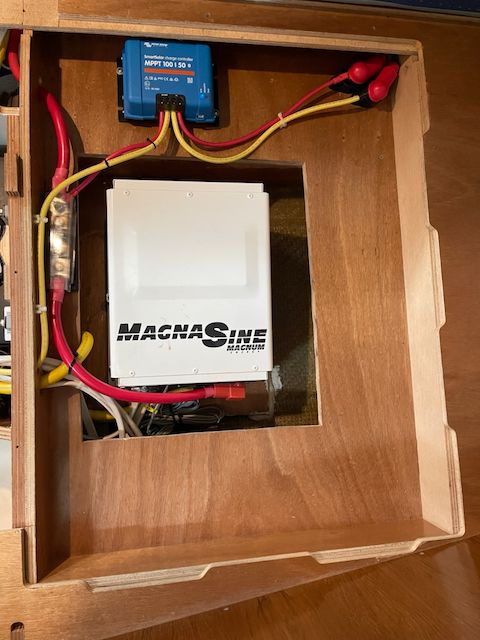
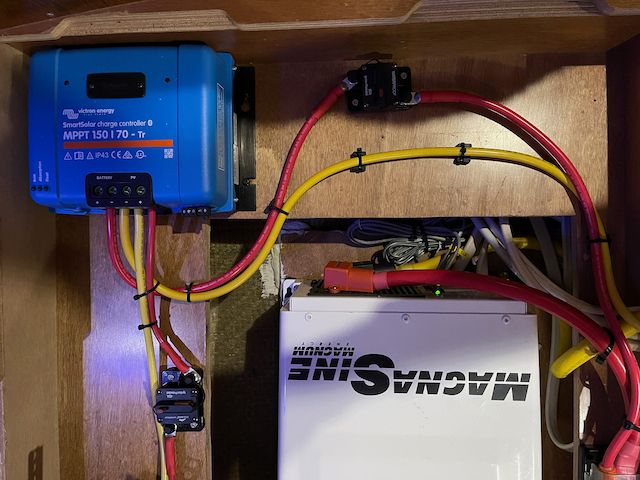
We have 4 chargers on board: Magnum MS2812, Victron MPPT for solar, Balmar AT-DF-165-K6 and the original Cristec-CPS2 charger of Jeanneau. As part of this project, we added a 5th one but we will come to that later.
Magnum MS2812
Our Magnum inverter charger is an older model so it doesn't have the built-in support for lithium-ion batteries. So after a bit of digging and trying custom vs CC/CV (constant current/constant voltage) charging, we settled on CC/CV.
Magnum is a very robust system but it is a bit archaic in its design and thinking. While I very much prefer Victrons and do choose them for new purchases, it just was not justifiable to replace a perfectly capable and working inverter and charger. When the Magnum shunt stopped working, we replaced it with a Victron smart-shunt without hesitation and have been very happy with its modern interface and monitoring capabilities via bluetooth and USB. For the Magnum shunt, I had to hack a bunch of cables, mess with RJ11 connectors and write some custom software to achieve the same!
Victron SmartSolar Charge Controller
Configuring Victron SmartSolar MPPT charge controller was trivial since it supports lithium-ion batteries directly. We adjusted the settings a bit to align with CC/CV settings on the Magnum but it wasn't that difficult.
Balmar Alternator
Balmar was a different beast though. Alternators and lithium-ion together can get pretty tricky and dangerous. Lithium-ion batteries have very low internal resistance and that is also why they can charge quickly. Essentially they are like sponges and can take a lot of current in until they are full and they may suddenly shut off when they are. This creates multiple issues for the alternator. First, it can overheat the alternator since even a high capacity alternator cannot continusly run at 100% capacity. Second, when the alternator is putting out max amps, if BMS shuts down the battery, that current has nowhere to go so can damage the alternator. For managing alternators with lithium-ion batteries, you will want a proper controller.
Our Balmar had an external MC-614 controller but it was also an older model and it didn't support LiFePO4 profiles. It could be configured in generic mode but I didn't trust it so replaced it with a newer MC-618 model. We didn't technically need an MC-618 since newer MC-614s also support lithium-ion profiles but while upgrading, wanted to upgrade to a newer version.
Even more importantly, we replaced the alternator temperature sensor. We already had a temperature sensor on the alternator but I had my suspicions that it had been mulfunctioning at times. A temperature sensor is key for ensuring that alternator is not overheating, this is especially important with lithium-ion batteries for above mentioned reasons. So it was safer to just replace it.
We also set the MC-618 to have a 30% field reduction, which limits its capacity to prevent overloading. We experimented with the Balmars, which are excellent alternators, but found the configuration interface to be somewhat lacking.
For configuring Balmar controllers, Rod “RC” Collins has an excellent guide. I highly recommend it if you are trying to play with your Balmar alternators and controllers.
Last but not least, we also installed a Sterling alternator protection device (also visible in the photo above and below). You can never be cautious enough with electrical installations...
Cristec-CPS2
This charger is fairly old and was apparently installed on the boat when it was built. It appears that these chargers were the original ones used on Jeanneaus. When the electrical system of the boat was upgraded by the previous owner, the charger was retained as a backup. It has a separate control switch and was connected to the house battery bank. Needless to say, this charger was not compatible with lithium-ion batteries, so we had to address this issue as well. I will discuss what we did with it in the next section.
Charging the Starter Battery
With the above changes, we wired all of the charging sources (with the exception of the Cristec-CPS2) to charge the house batteries. However, this left us with the question of what to do with the starter battery and how to charge it.
Renaissance had one of these battery combiners in place.
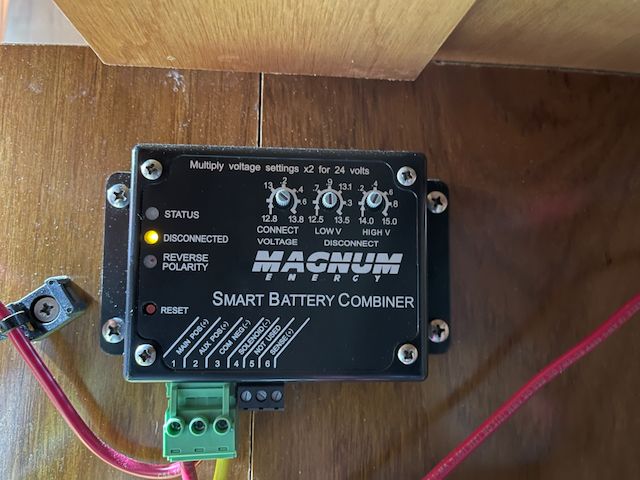
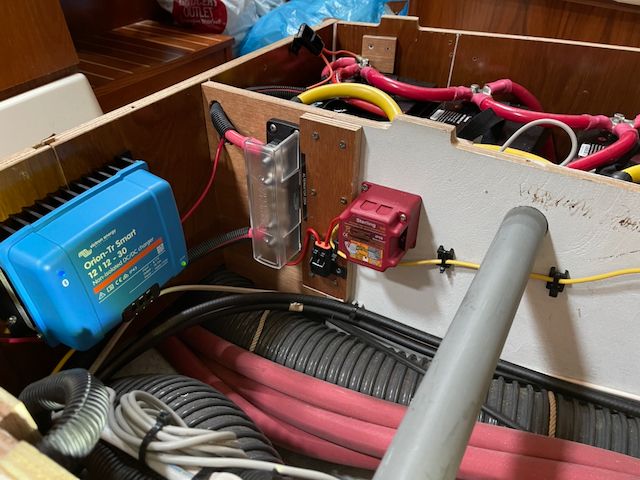
Battery combiners are simple devices that connect the starter and house batteries when certain voltage thresholds are reached. Personally, I do not generally like these devices, but they are especially not suitable for a lithium-ion setup. Combining batteries with different chemistries that require different voltages can damage one set of batteries or the other. Therefore, we removed the battery combiner and replaced it with a Victron Orion-Tr DC-DC charger (as a side note, the Victron Orion-Tr DC-DC charger is my least favorite Victron device. It does not measure up to the quality of their other products. Firmware doesn't support the same bluetooth capabilities that are available in other Victron products, it doesn't support instant readouts, it cannot participate in VE.Smart networking, etc.).
In the final configuration, the Magnum MS2812, the Balmar alternator, and the solar charger are all charging the house lithium-ion battery bank, and that battery bank is charging the starter battery through the DC-DC charger. This setup allows us to customize the charging profile for each of the batteries based on their specific needs.
Finally, we chose to retain the Cristec-CPS2 as a backup charger for the starter battery. When we are connected to shore power or using the generator, this gives us an alternative way to charge the starter battery. We usually keep it disabled, but it is always good to have a backup option available.
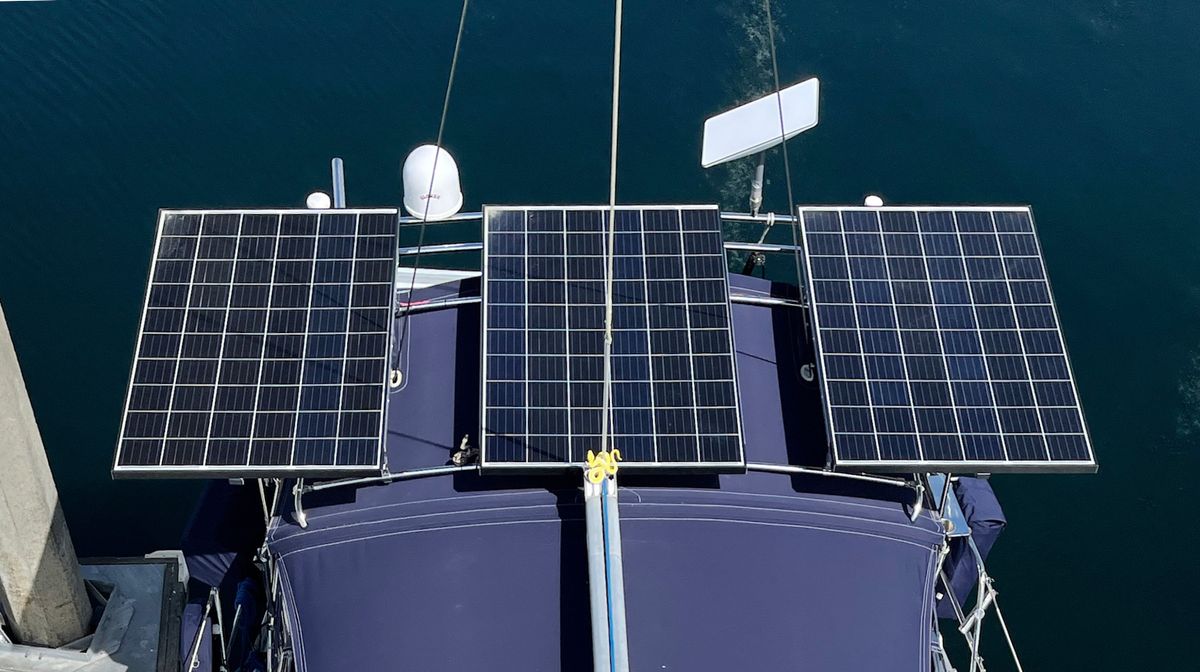
Maximizing Solar Panels on a 43ft Monohull Sailboat
Replacing the batteries gave us a 700Ah house battery bank and a 100Ah AGM starter battery. Of the 700Ah, approximately 550Ah was easily usable, which was more than double the usable capacity of the previous setup. While this extended our time away from the dock, it still only provided a little over a day's worth of power for us. As we try to minimize our use of the generator, we needed to find ways to increase our clean energy sources. Solar was the first option and we really never considered wind. We already had 400 watts of total capacity, which may be considered a lot by some, but we needed more.
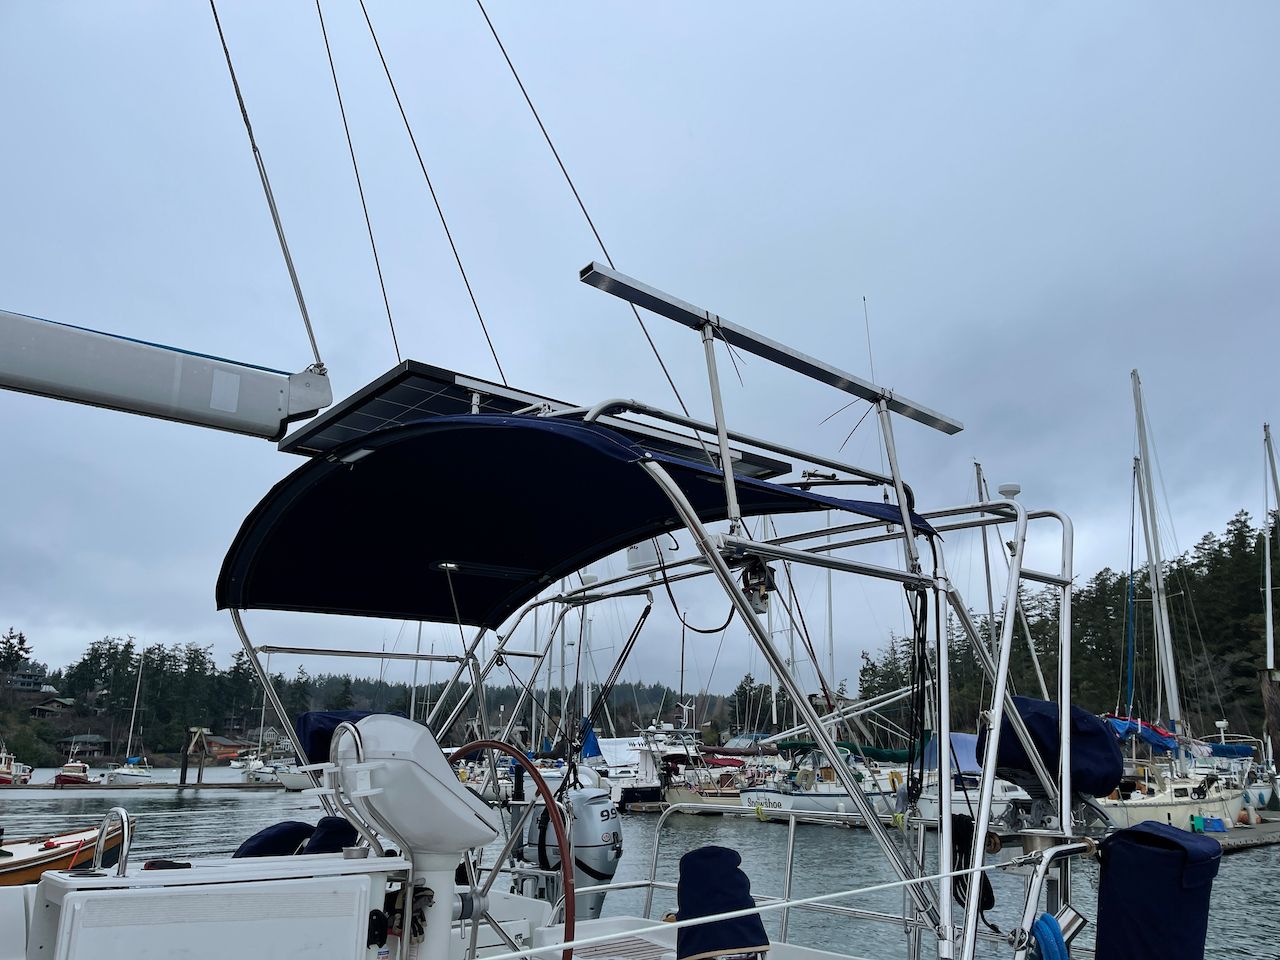
Increasing our solar capacity required a lot of creativity, planning, and design. By this point, we had been on the waiting list for a new enclosure and bimini setup from Iverson Design for nine months. Finally, they were installed and it was worth the long wait and the cost. Iverson also installed their solar mounts on the bimini.
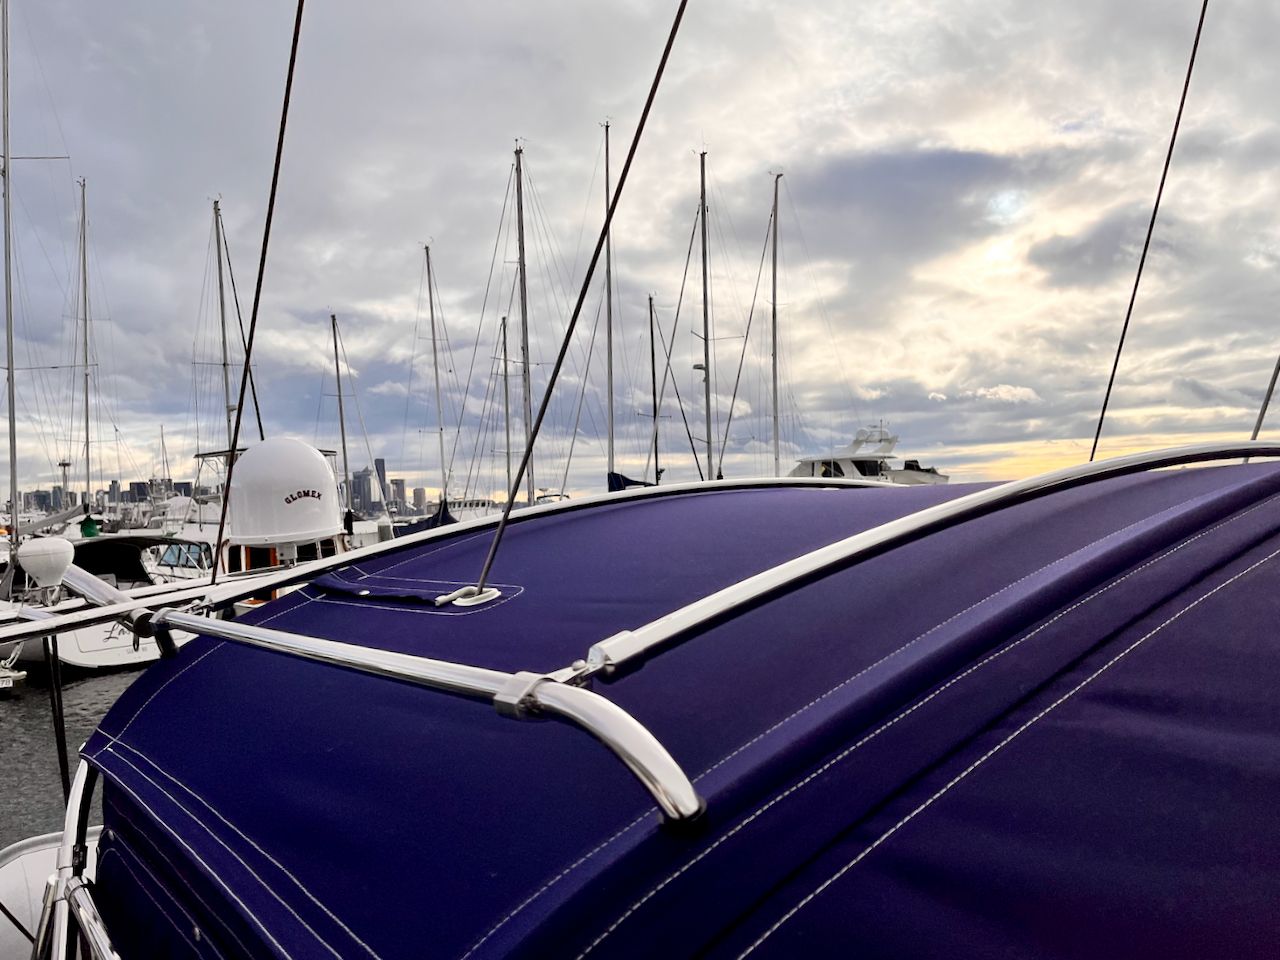
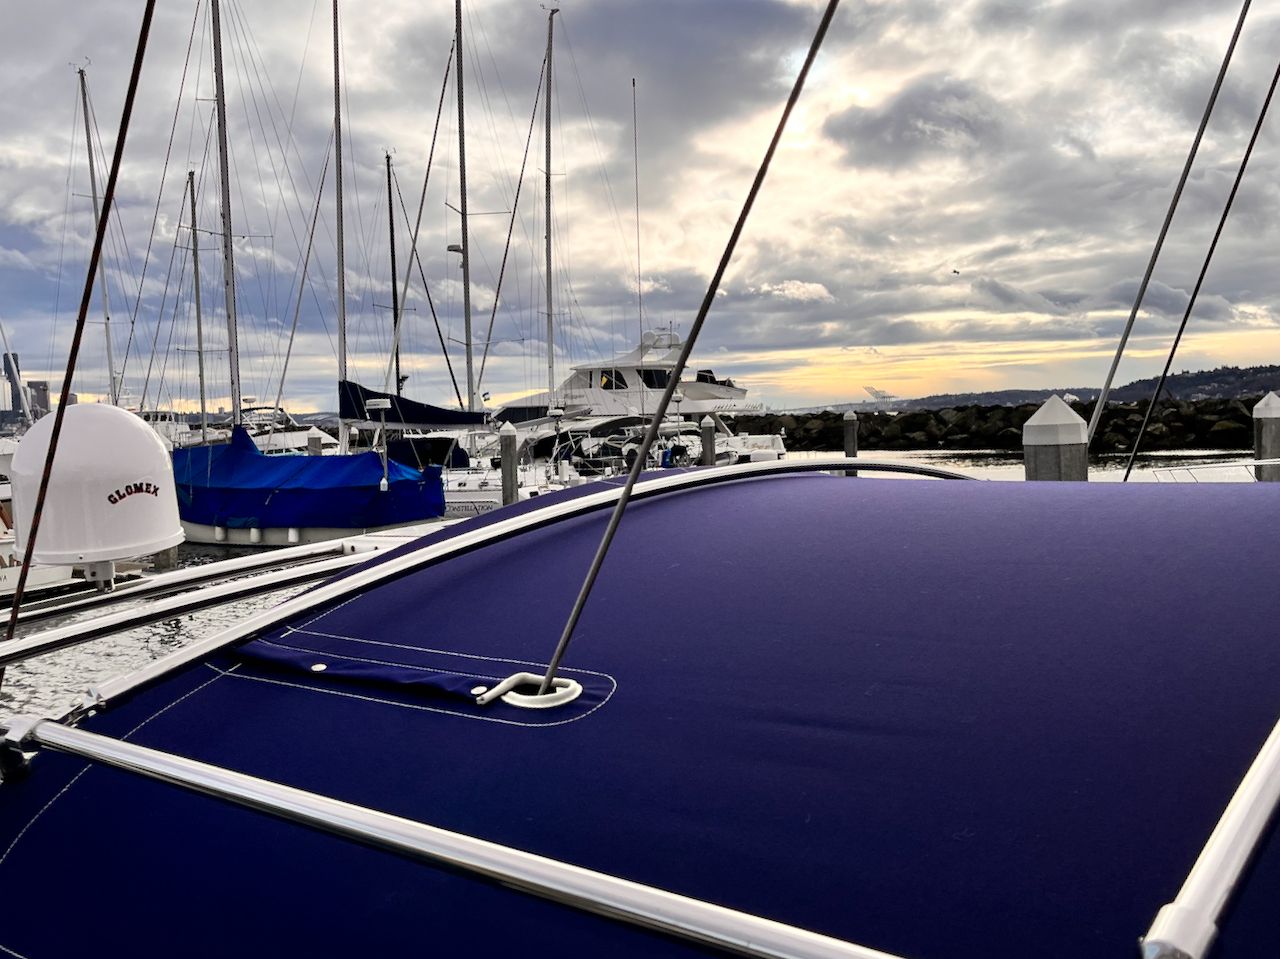
The Iverson solar mounts are useful, but their service does not include installation or parts for the solar panels even if you pay them. I began considering ways to increase the number, capacity, and efficiency of the panels that could be mounted on them. We quickly ruled out flexible panels. While they are easier to install and lighter in weight, they have lower capacity, efficiency, and lifespan compared to hard panels. As our goal was to maximize solar power, we decided to stick with hard panels, accepting the trade-offs of increased weight and bulkiness.
I contacted a few marine and machine shops about the project, but either they felt it was too complicated or too small, and we did not receive any responses. As a result, we had to make this a DIY project...
I am handy with a lot of things, particularly electronics, but welding stainless steel is not something I would dare to attempt. So this had to be done with some modular parts. This required a lot of research, measurements and planning. The main goal was to maximize the number of panels and their capacity, so limits were the beam of the boat and the space between the boom and dome on the arch. This became an optimization problem!
We ordered four 320 watt Renogy solar panels for the project. We didn't have the space for four, but they were only shipped in pallets of four so we had to get that many. The delivery process was quite an adventure. The panels were delivered to our UPS store and as soon as they arrived, I received a call from the store saying, 'Sir, there is this huge thing for you here... It doesn't even fit through the door, can you come and pick it up now?' Thankfully, I was expecting that and was prepared for it.
We chose Renogy because we were satisfied with our previous panels from them and they were the right size for our needs. In order to maximize capacity, dimensions were crucial. A few inches longer would cause the panels to hit the boom, and a few inches shorter would reduce their capacity.
Next, we needed mounting parts. As this was a custom job that required no welding, I chose to use dodger and bimini parts from Sailrite and marine grade aluminum angle and rectangle tubing from OnlineMetals.com (which conveniently has a warehouse a few miles from us, so I could pick them up locally)
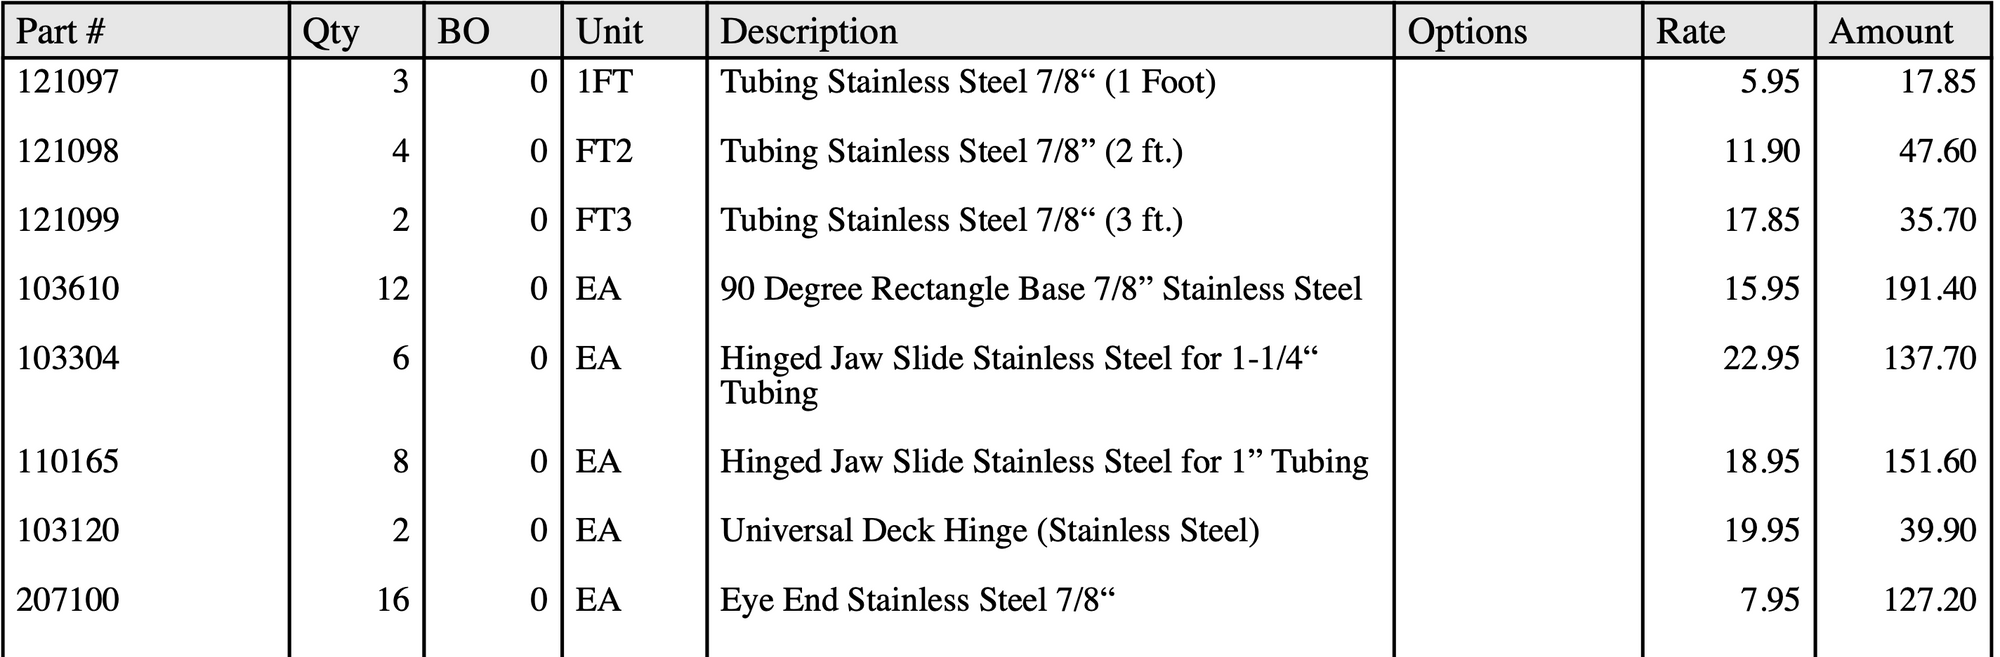
I was initially anxious about the complexity of the design, but it turned out that the planning and number of parts were exactly right. After taking more measurements, cutting the tubing, drilling, and so on, we were ready for installation in January at Friday Harbor on a rainy weekend!
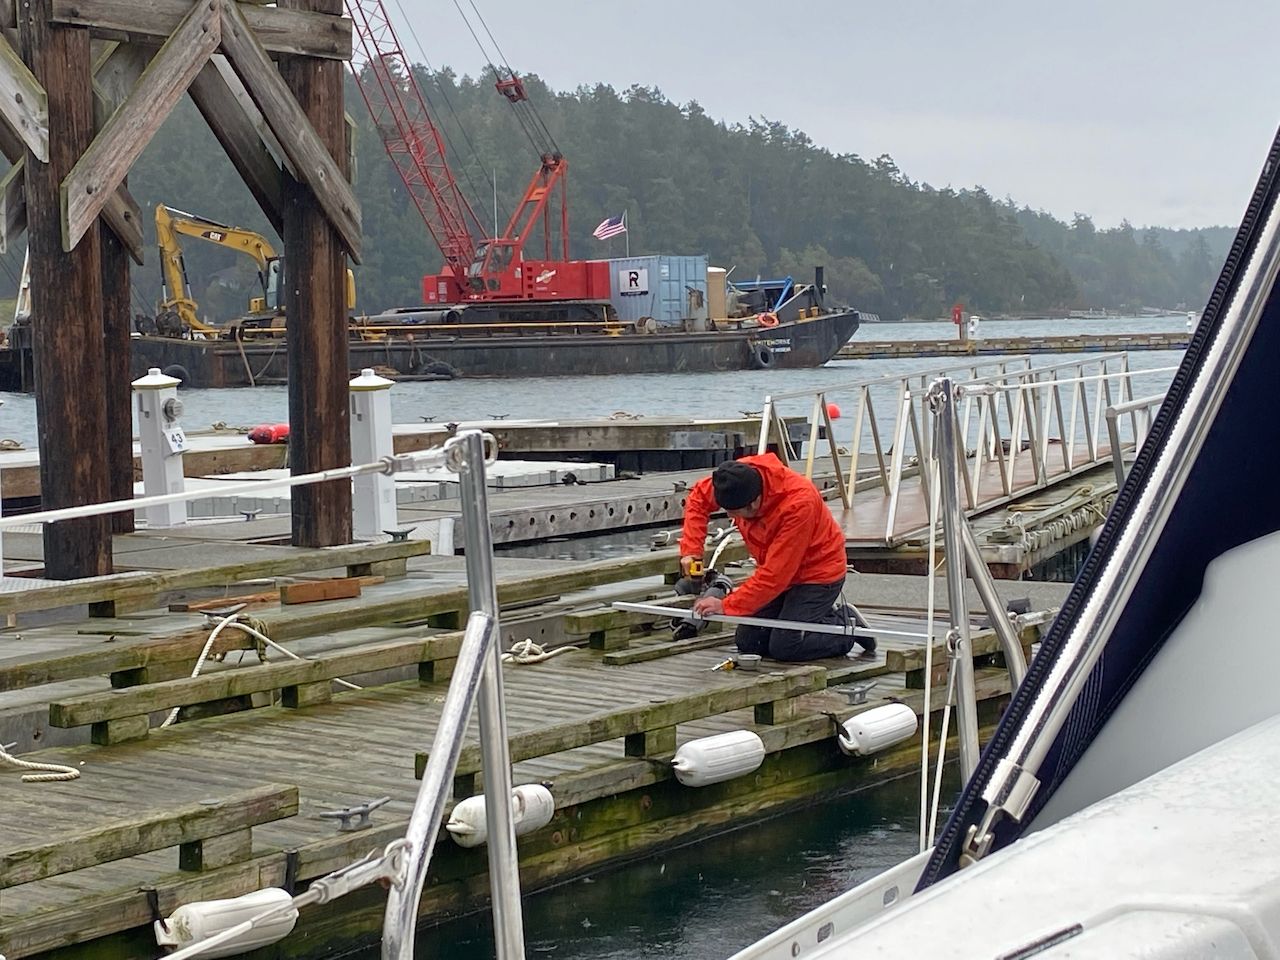
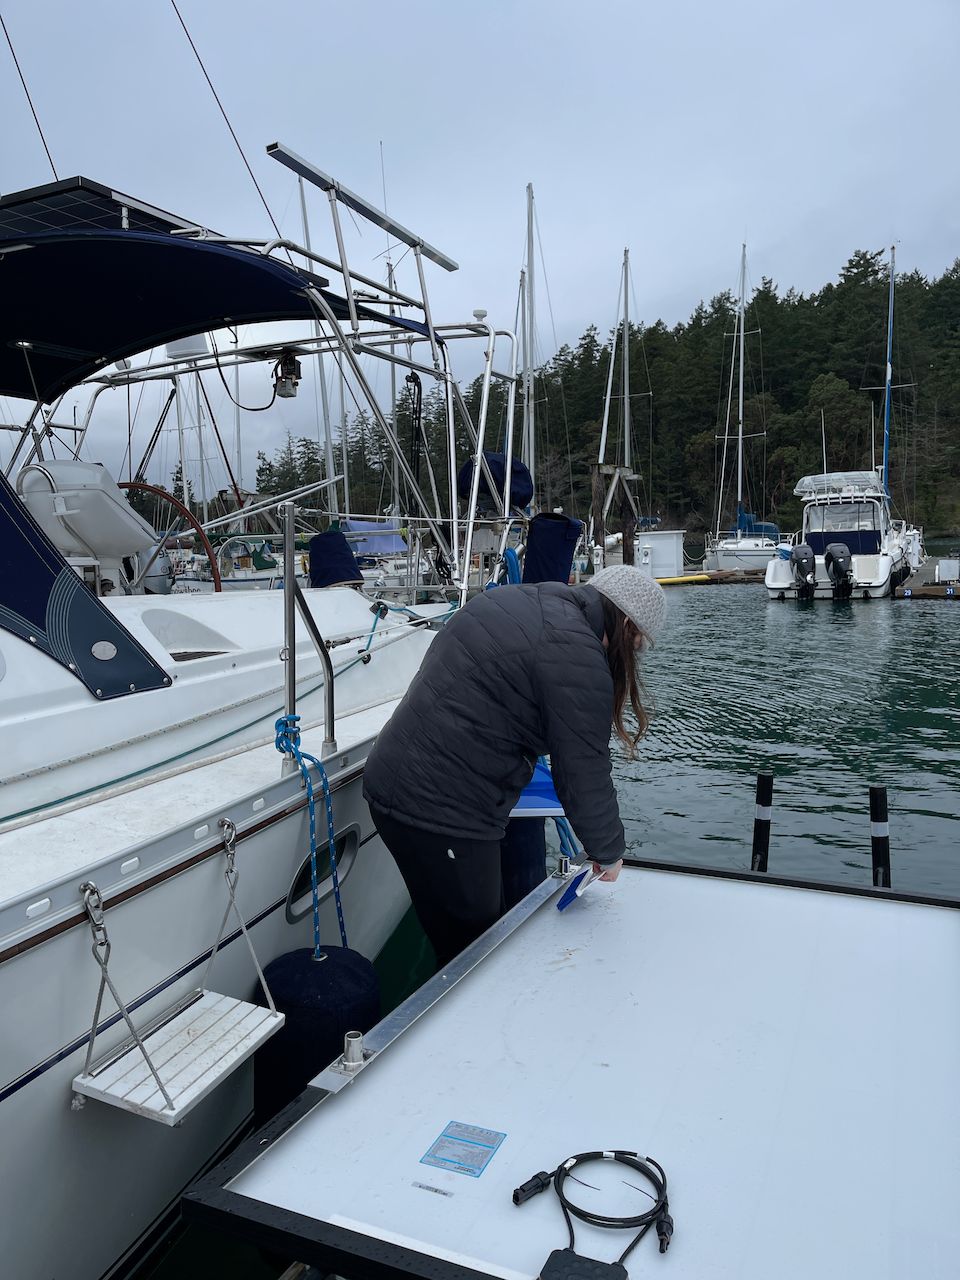
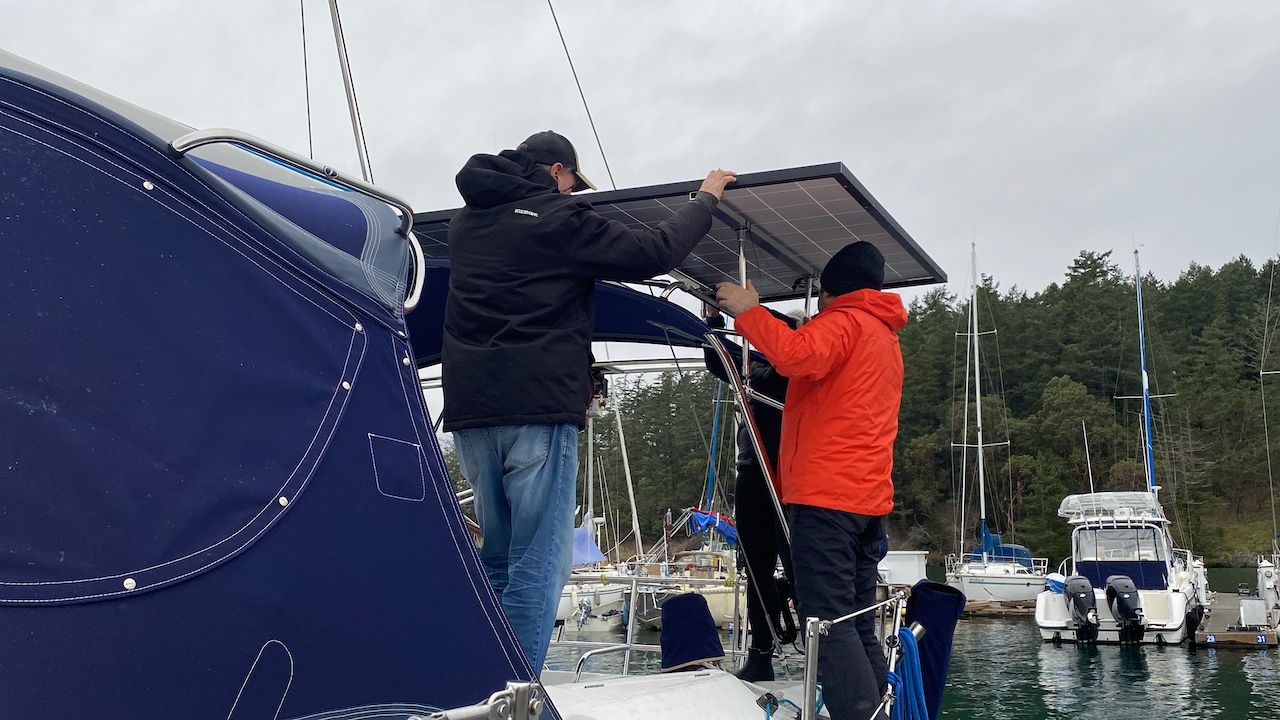
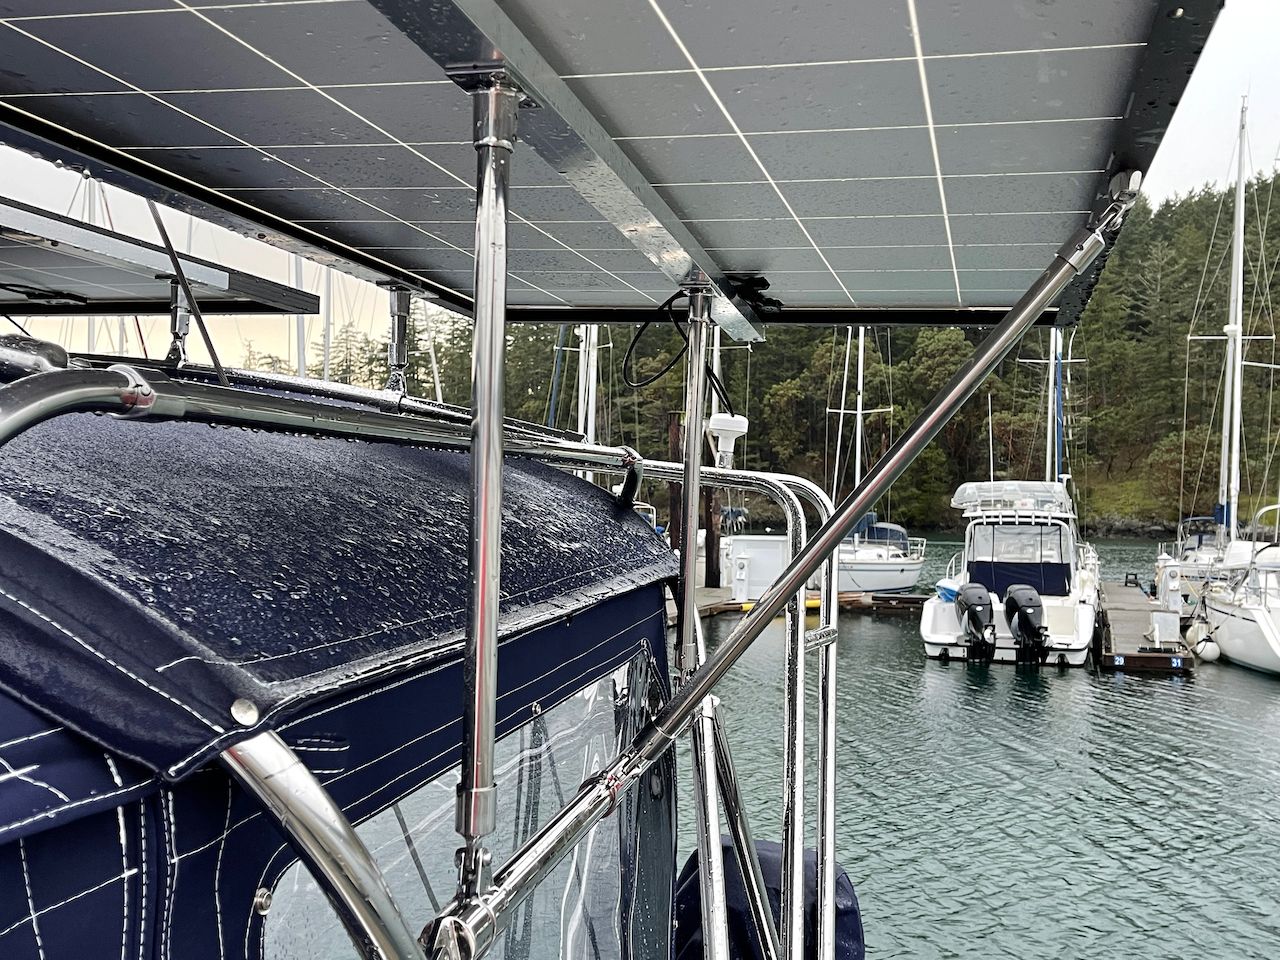
The installation was non-trivial, but it was a major relief and success when we completed it. We decided to get some extra parts for additional strength and fortunately, the local canvas shop in Friday Harbor had them. These parts were not strictly necessary for the installation, but they made the mounts more sturdy. We tested them in 50 knot wind gusts later on and haven't had any issues, proving the sturdiness!
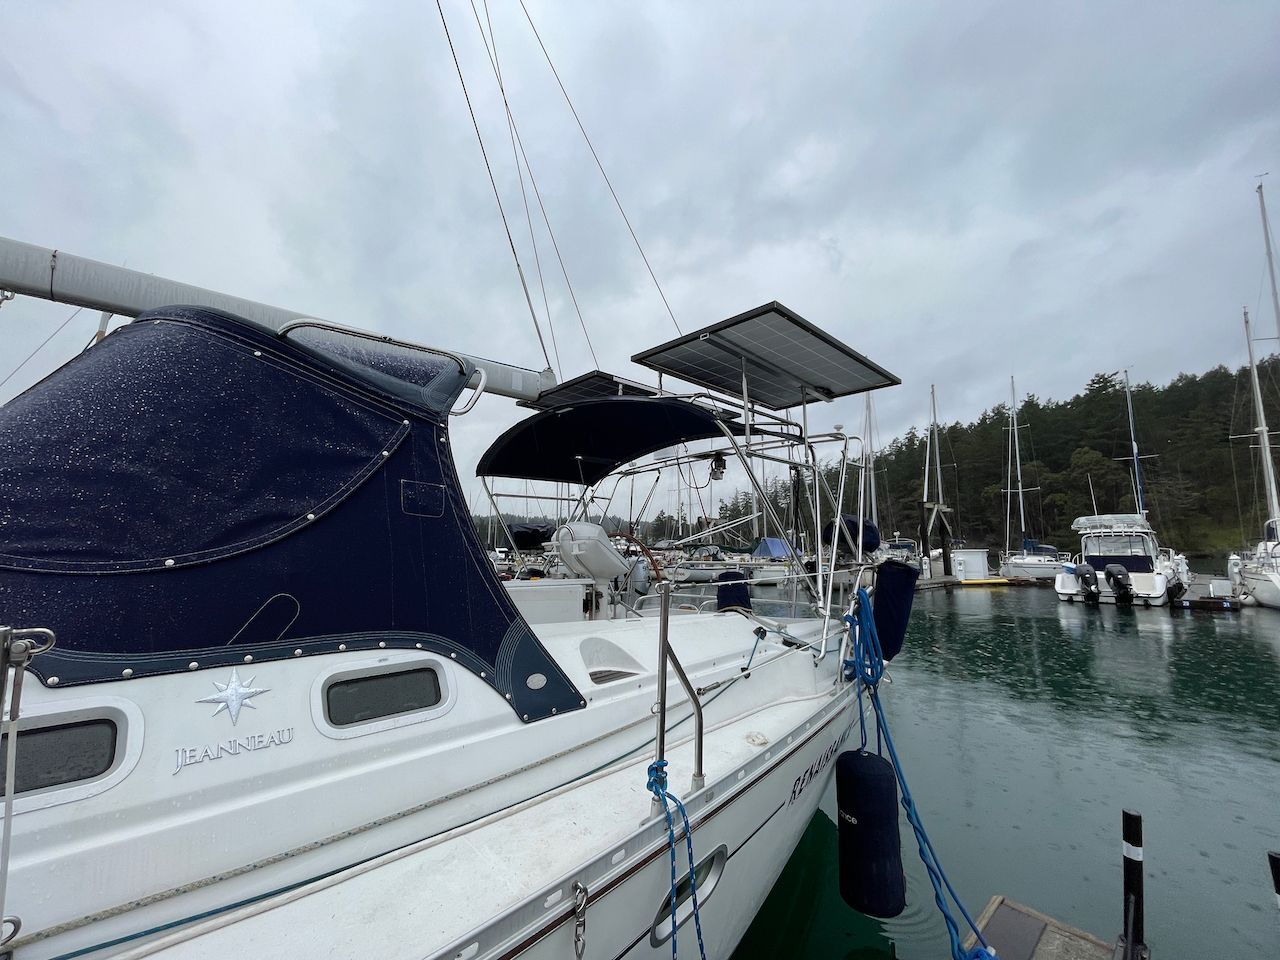
We installed a total of three 320 watt 24 volt panels, giving us a total capacity of almost a kilowatt. This required an upgrade to the solar charge controller. We initially ordered an 80 amp model but it was too large, so we decided to go with a 70 amp controller instead. This setup could technically exceed 70 amps at its peak, but we didn't think it was worth the extra effort of cutting more wood to fit the 80 amp controller.
The rest of the process was mostly plug and play, since all the necessary changes had already been made while upgrading to lithium-ion batteries.
How Much Power do 960 watt Solar Panels Really Generate?
Completing a major solar project in the middle of winter in Pacific Northwest (PNW) has one major downside. You don't know what you fully achieved until days get longer and the sun gets out! So we had to wait until sunnier days to see the true results.
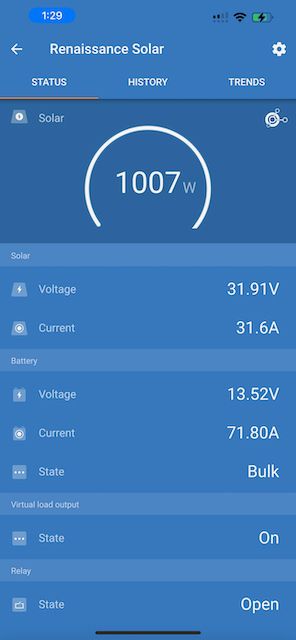
On a beautiful sunny day, we could see what seemed even a little suspicious. This didn't last long, maybe less than a minute but we have managed to observe similar outputs at different times. But obviously this is not what you get on average, so we needed better measurements.
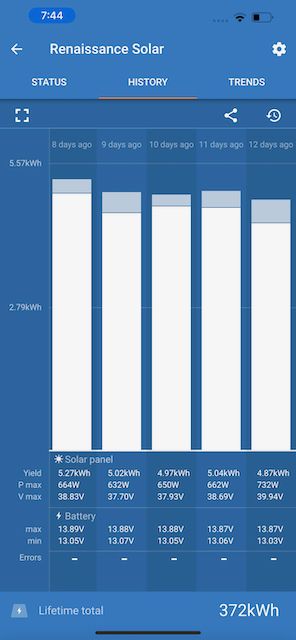
During reasonably bright summer days, our solar project consistently produced an average of around 5kWh per day, which is equivalent to approximately 375Ah for a 12V battery system (since batteries charge at voltages higher than 13V). Our record was more than 6kWh (about 450Ah) on a beautiful PNW day.
In the screenshot above, you can also observe that the controller entered absorption mode but never reached float mode, indicating that the batteries were not fully charged using solar power alone. This is not unusual, as our daily consumption typically exceeds 375Ah. As a result, our average daily power deficit during the summer months was between 50-75Ah, depending on the specific day. And on particularly bright days or usually on the weekends, we could have a power surplus if we didn't get crazy with laptops or the Internet.
With 700Ah lithium-ion battery capacity, this easily lasted a week or more, during which we usually moved between different anchorages, requiring us to run the engine at least for a while. Our high capacity alternator can put in more than 100A while we are motoring, so this usually kept the batteries topped off.
Conclusion
Energy and power are important. I don't think we need to take it to the Kardashev scale (a method of measuring a civilization's level of technological advancement based on the amount of energy they are able to use) to correlate the level of comfort one can have a boat while cruising and working to emphasize it's importance but we have witnessed first-hand that living and working comfortably requires a lot of power.
We needed the right setup for having that energy available without burning unnecessary fossil fuels (our diesel engine already creates enough exhaust and we ensure to maximize power generation with a high capacity alternator while it is running). We invested a fair bit in our electrical systems, batteries, alternator and solar setup to be essentially energy neutral during at least the primary cruising season in PNW.
From the beginning of May until the end of September, we never connected to shore power even when we were docked at marinas. It was not needed, and was an unnecessary nuisance to even get the power cable out of the lazarette.
We are very happy we could do that while living and working comfortably, with multiple Starlinks, helping community with shipping traffic and weather reports, running fridge & freezer for keeping perishables, keeping ice for our evening cocktails and making gourmet espressos in the morning and during the day for ourselves and others in remote anchorages!
